Part three in this series of blog posts will delve into how I worked the embroidery for this book cover on both the book boards and for the title on the spine. It then culminates in the binding being covered with these decorated pieces of leather.
Post number two described how I forwarded the book and came up with the grid-like design for the cover. Once the onlays had been cut to shape and stuck down I was then able to start the embroidery process. I wanted to add colour and texture to the cover through the use of different threads and stitches to built these up slowly starting with long couching stitches of varying lengths stitched along the dark brown goatskin onlays, as seen in the below left image.
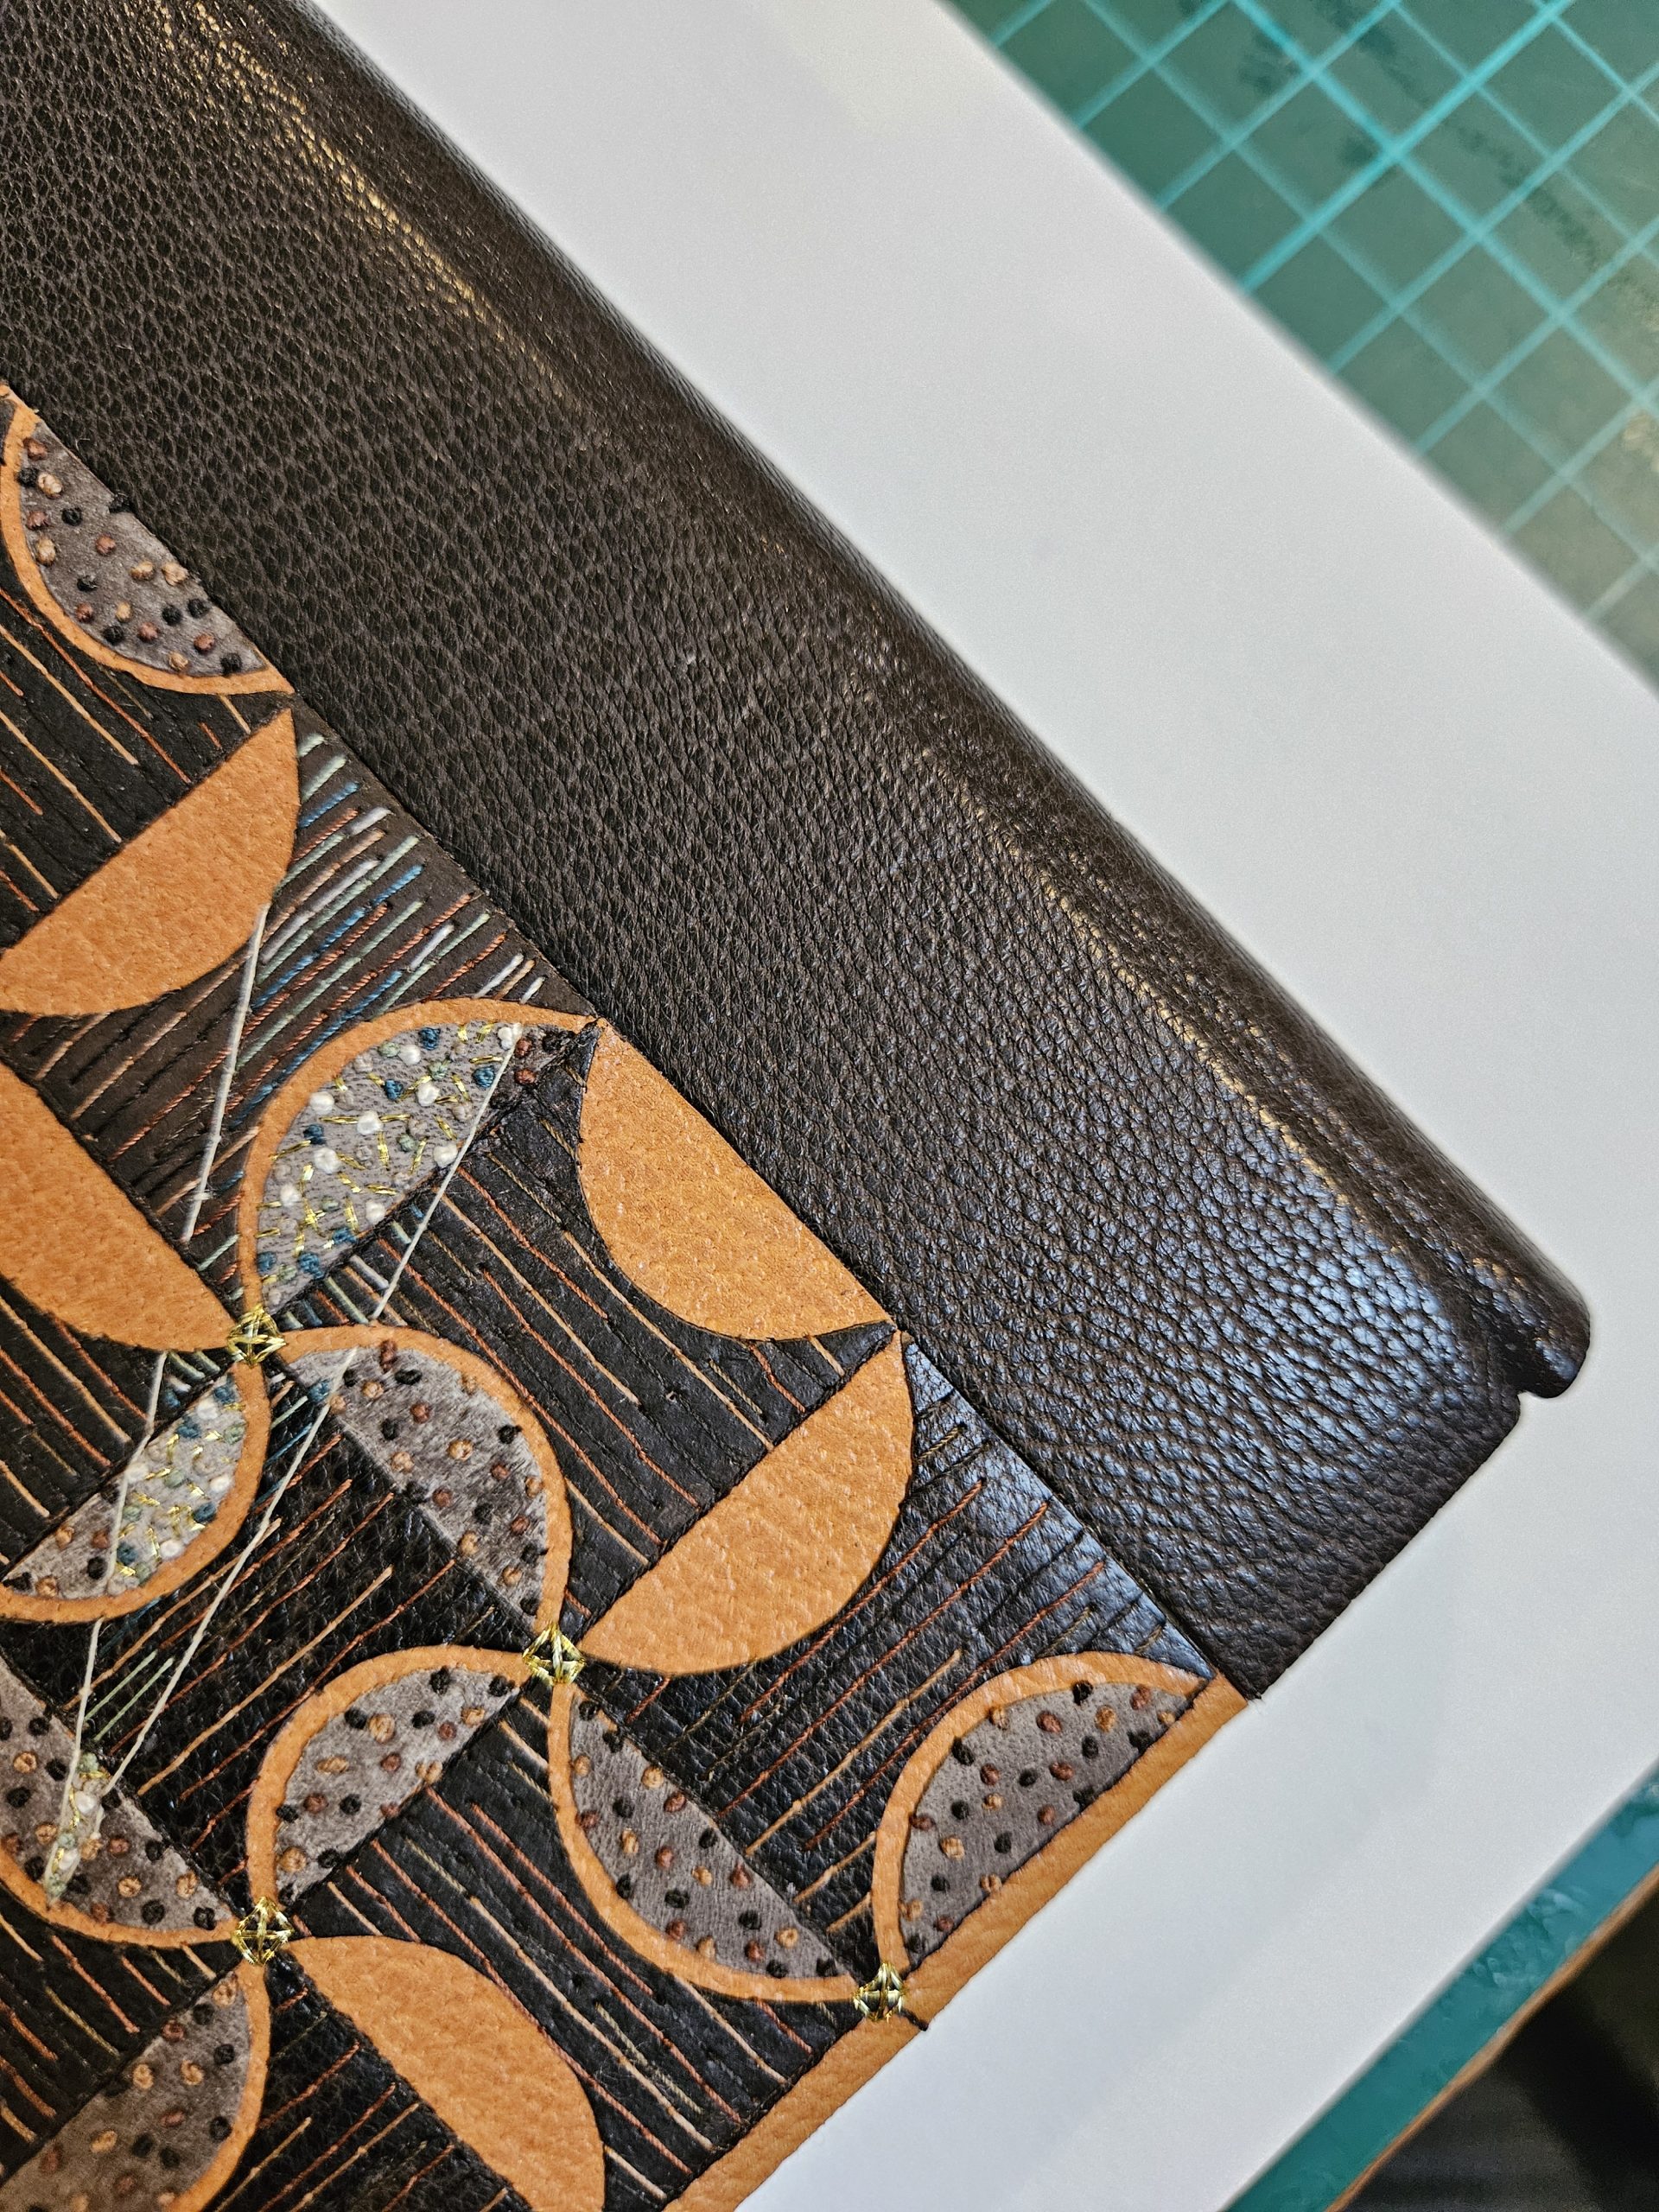
As well as being a design choice, the fact I had chosen to cover the spine in different leather to the boards helped when it came to handling the leather during the embroidery process. The book was large so if I had planned to cover it in once piece of leather it would have been more difficult to manage. Three of the edges on each piece of the orange pigskin had been pared thinner to allow for turn-ins, with the fourth edge cut straight and flat to butt up against the spine leather.


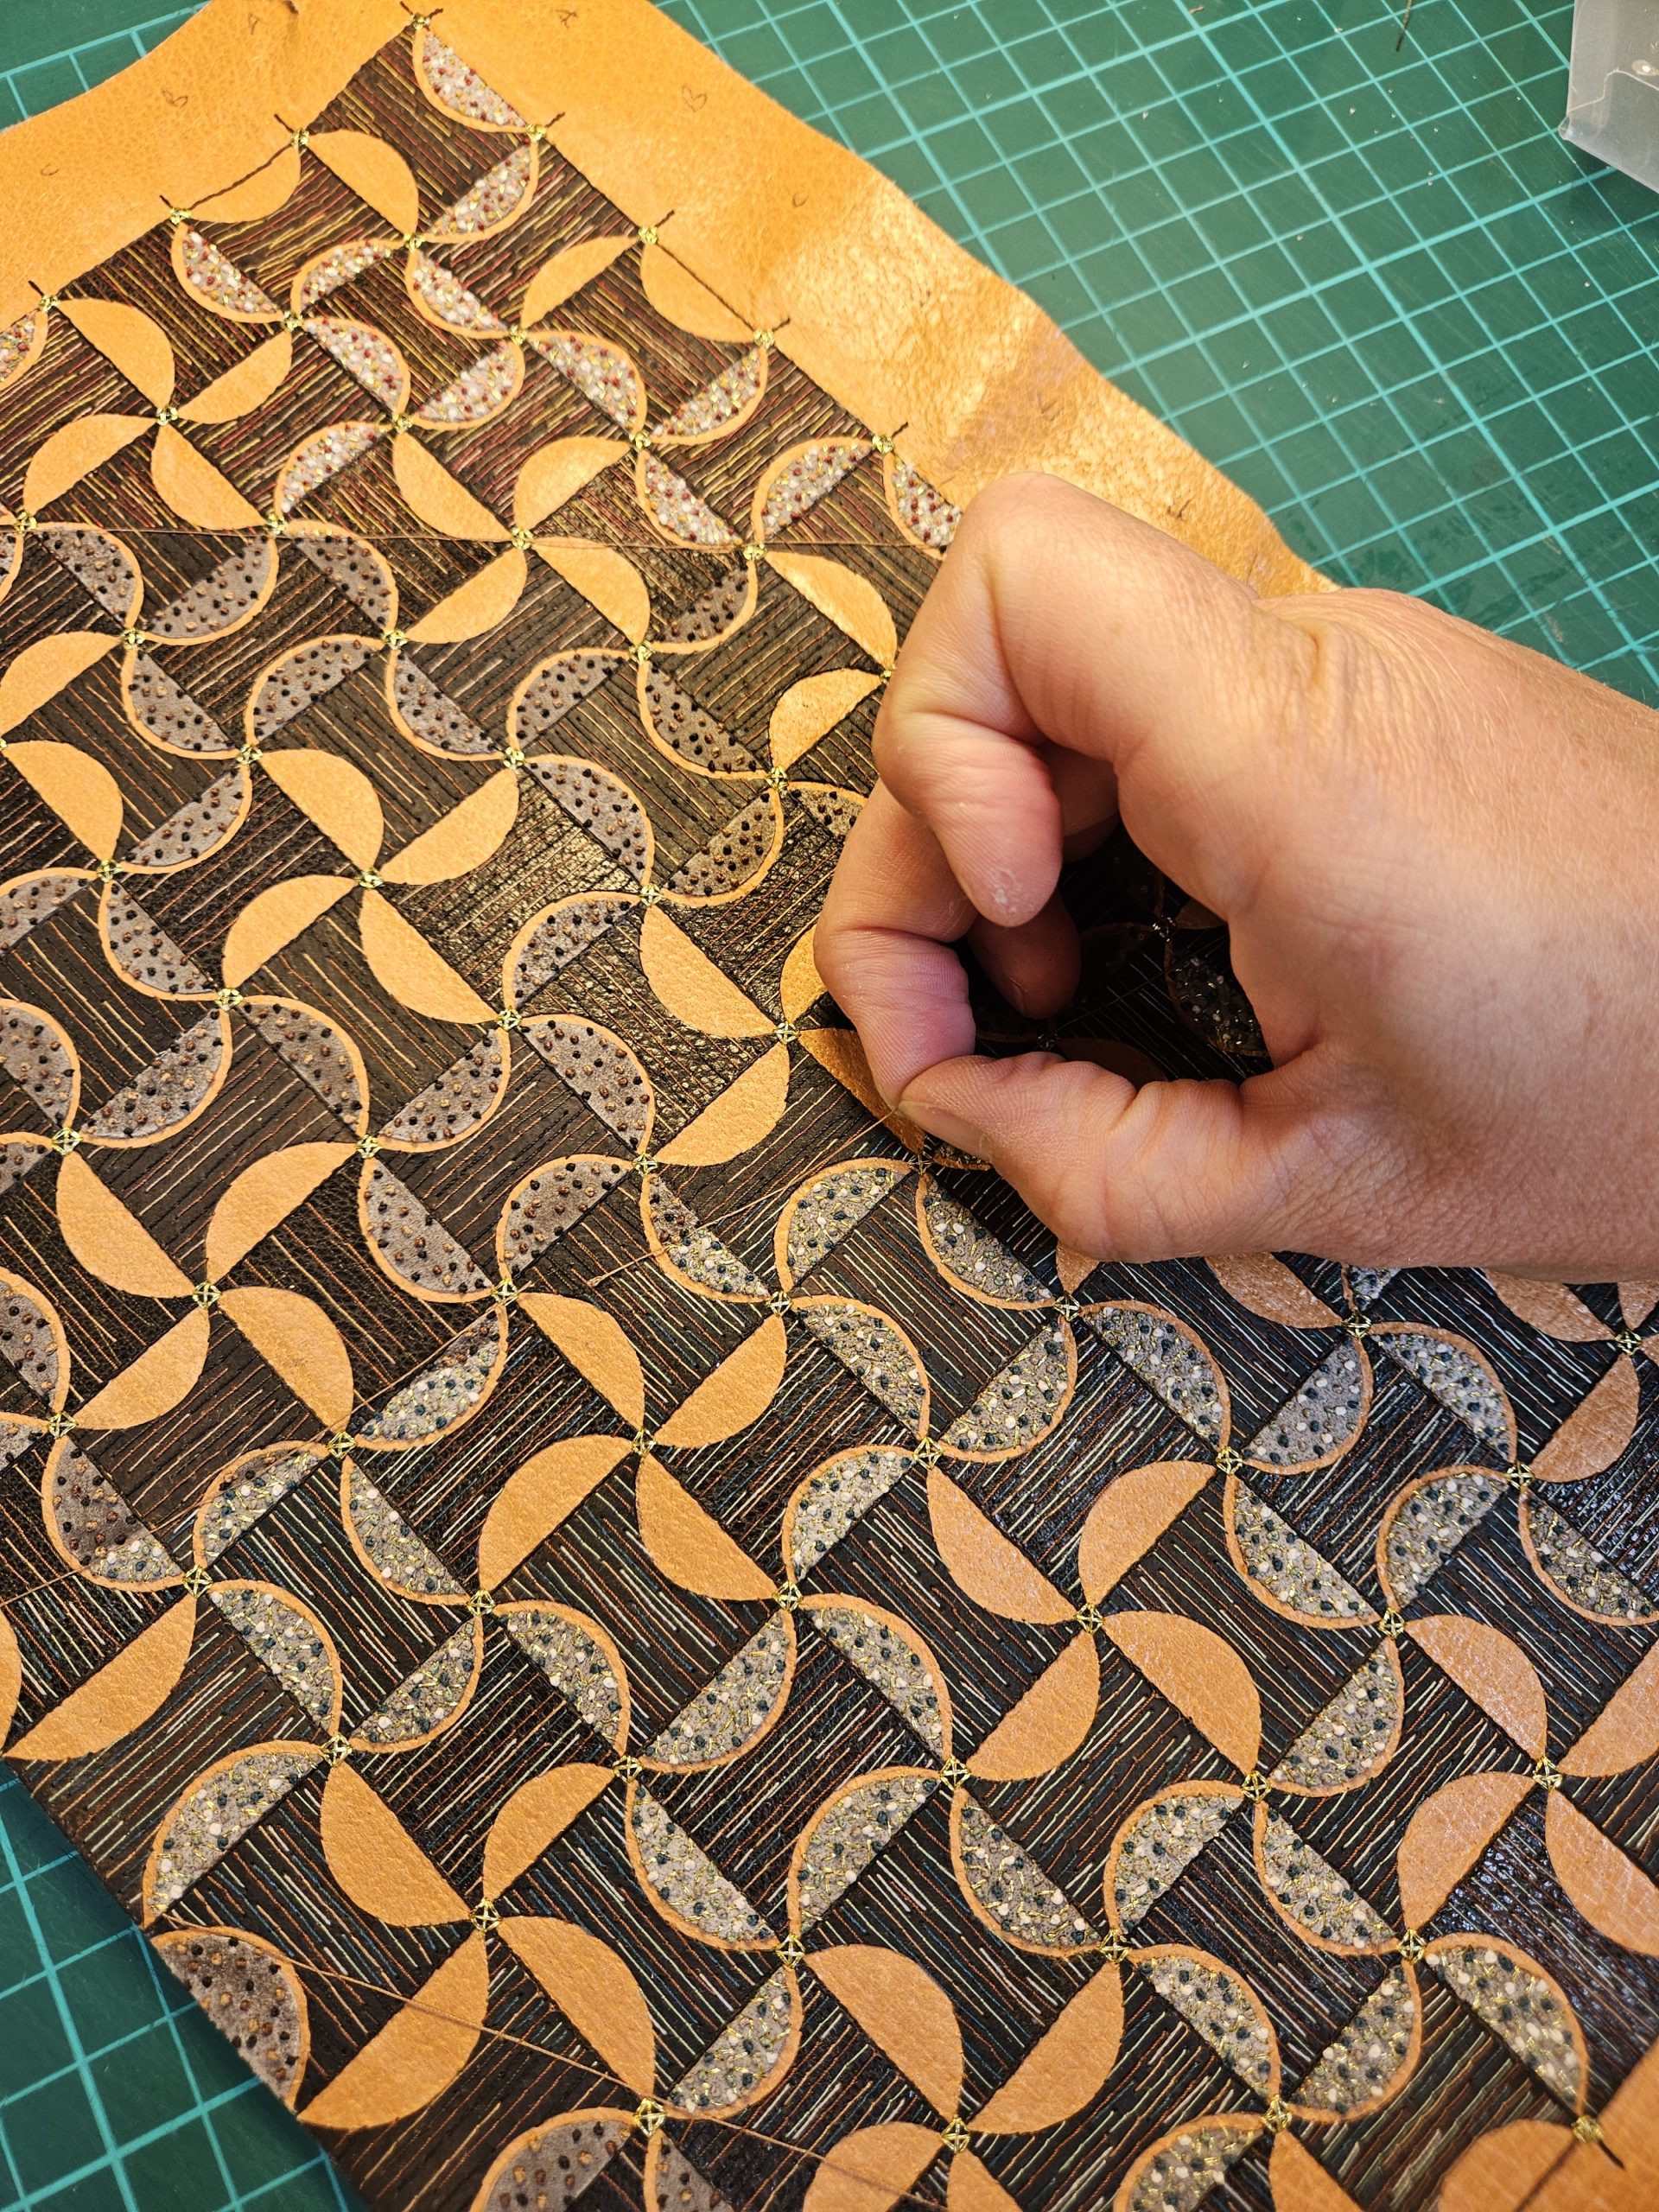
After working quite a lot of stitches in shades of brown, I decided I wanted to add a flash of colour into the cover design too. I chose to add “shards” of other colours within the grid, perhaps as if a coloured light was catching on the surface of the cabinet. One set of shards would have pale green tones (as you can start to see in the below right image) and I “masked” the area I need to sew these in with a strip of thread sewn loosely onto the cover.


You can see this “masked” line a little more closely in the below right image. This photo also shows the application of gold squares at the intersections of the brown grid lines, sewn with metallic thread. First a square was sewn and in the centre a cross added to add a bit of extra detail to the covers.


I progressed on with lots more couching stitch to build up the texture and colour.


The below image shows in more detail the added colour applied in the “shards”: the cooler green tones and then also some warm red and yellow tones for contrast. The masking threads were just temporary to mark out the zones in which to place the colours and would be removed at the end of the process.
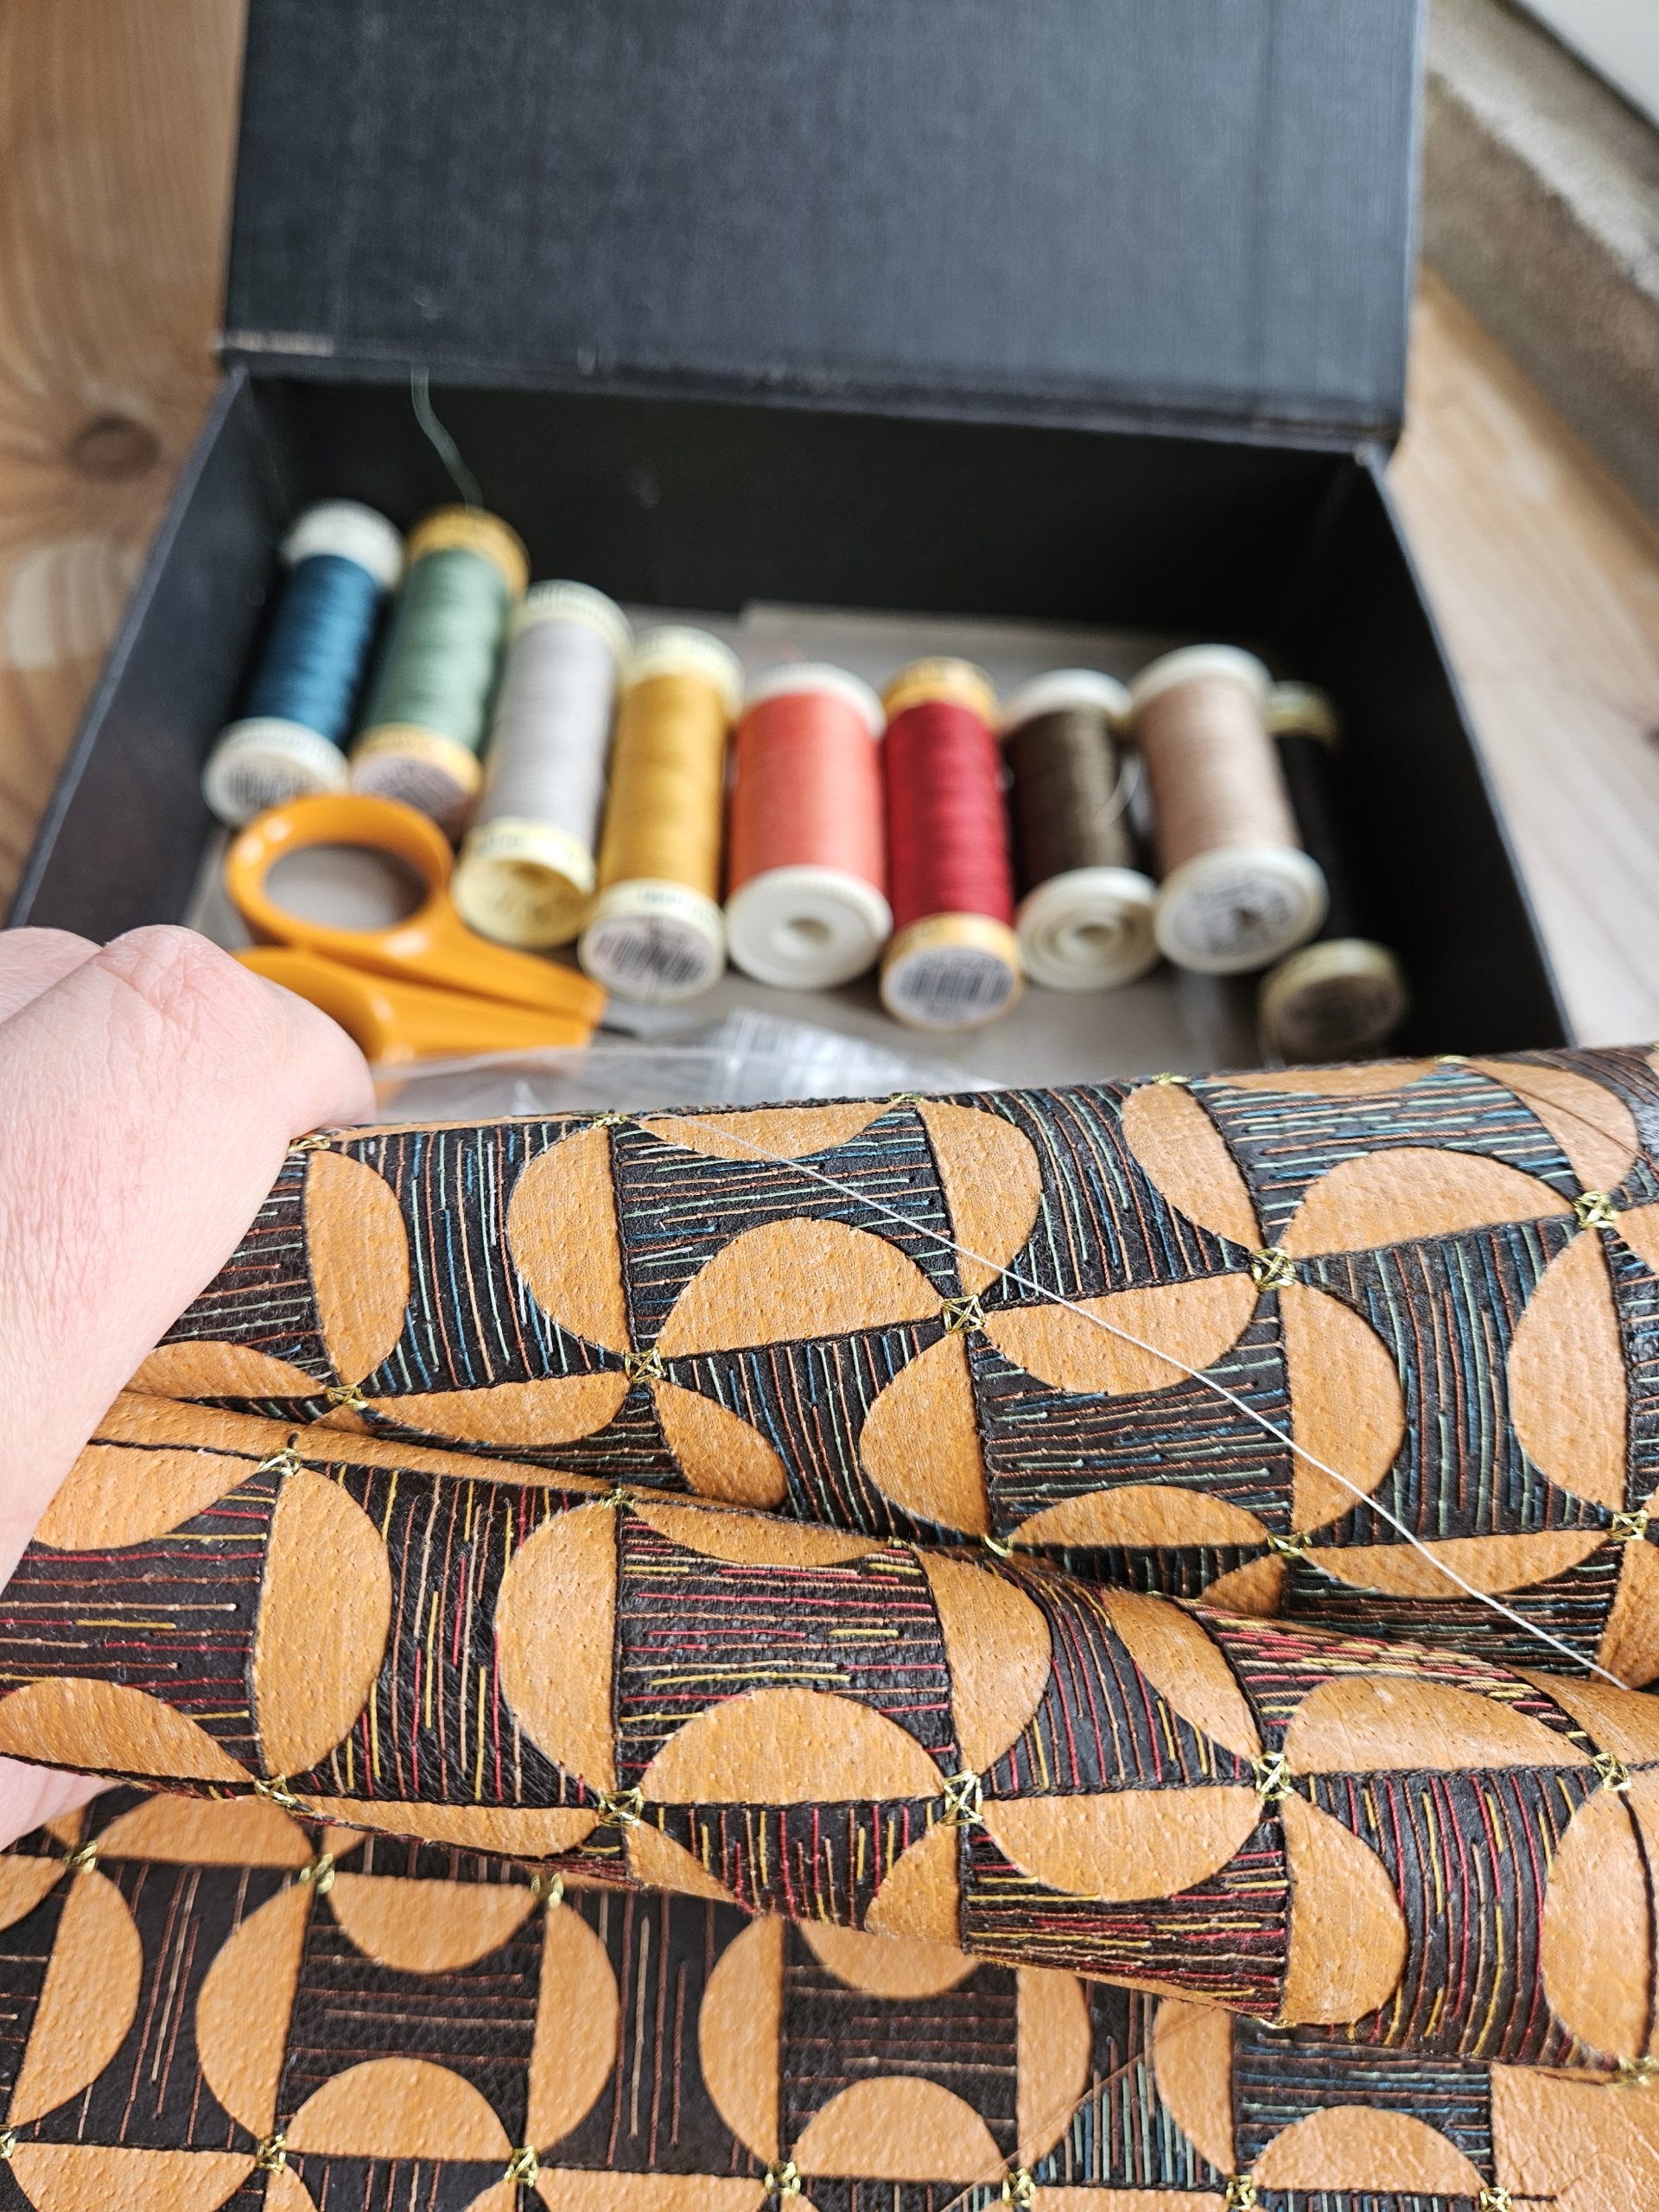


Once I had completed the couching stitches on the dark brown onlays it was time to move onto the half round ones which I had already cut to shape and size. They were positioned into place and glued down with PVA glue.


In the original cabinet imagery image these appeared to have a circular pattern on the surface so I chose to decorate them with French knots. I started the process of embroidering knots through them all in varying tones. A French knot is a decorative embroidery stitch that forms a small, raised knot or dot on a fabric’s surface, so it is perfect for building up little fleck of colour to make the rather dull coloured onlays more interesting.


I used a needle pricker to pre-prick the holes through the leather. Each French Knot I applied to this skin was double knotted and I don’t use the “conventional” way of tying them. The standard method of creating a French Knot is by winding the thread one or more times around the needle and drawing the needle back through the material at the point where it came out. Instead, I create my knots by looping the thread into a loose knot on the top surface of the material, and then pull the thread down the needle to the point so that is knots tightly to the surface of the leather in exactly the right place (and then I do it again to create the double knot). I then push the needle back through to the back of the leather and move onto the next one…and repeat and repeat!
This is hard to illustrate properly in photographs but I have tried to do so in the below three pictures. Given on average there are about 28 knots per onlay, and there are 230 onlays that totals a staggering 6440 knots in this one commission alone!


Once I was happy that the embroidery was complete I was able to remove the temporary threads I had applied to the surface of the leather leaving the coloured shards of threads to work alone without them.
It was then time to work on the spine leather. I prepared a strip of the chocolate brown goatskin to the correct size for the book spine, and pared the head and tail for turning it down into the hollow when covering the book. In the reference book I mention in post one, “Ernest Gimson: Arts & Crafts Designer and Architect”, were many examples of technical drawings done by Ernest Gimson. These pictures were neatly labelled by hand so I chose to use this font to title the book.
I drafted out the words, “His Life and Work” onto tracing paper and used this as a guide to punch holes through the spine leather. I then embroidered the title using very fine polyester thread, with a whipped running stitch.


To add an extra detail to the spine, I also decided to depict one of Ernest Gimson’s drawings of a cabinet handle (not exactly the same as the one used on the cabinet this design drew inspiration from but very similar). I used the orange pigskin from the cover, pared it thinly and then glued it centrally on the spine.


I added detail to this using embroidery threads and small dots of gold leaf.


Once this was done it was time to stick the leather to the spine of the book. It is generally easier to work in this way: the spine being covered in a different leather to the boards. It means that when covering the book with the spine leather you aren’t also having to try and turn-in the leather around the boards during the same process.
I dampened the front of the goatskin with water and applied three layers of paste to the reverse, giving time between applications for it to penetrate in. I also added some PVA glue to the joint areas of the text block to ensure good adhesion in this area. Once the leather was on the book I left it under a weight overnight, changing the blotting paper regularly to draw out the moisture.


I was then able to progress on to the next stage of the title, after all the book wasn’t just named, “His Life and Work”, which was the only writing on the spine so far! Within the refernce book was the cursive signature of Ernest Gimson and I decided that I’d like to try gold-tooling this onto the other end of the spine to complete the title of the Book (“Ernest Gimson: His Life and Work”).

It was quite a while since I had done any gold tooling work, so I was pleased to have the opportunity to dust off the toolbox containing all my gold-tooling paraphernalia and give this a go! I first did a test run on a flat piece of the brown goatskin which, if it worked correctly, I could use on the lid of the box.
I wrote the signature on a piece of thin hand-made paper and I fixed this on top of a strip of the leather. I heated up hand-made, single line pallets of different lengths on a stove to blind tool the cursive signature onto the leather (see below left image). Once that was done, I used a size 000 brush to paint glaire into the impressions made. I applied two coats of glaire, letting them dry between applications (see below right image).


It was then time to add the gold! I cut up small squares of 23.5 carat medium deep loose leaf gold on my gold cushion. The small pallets were heated up on my stove, and once they were at the correct temperature I applied a little Vaseline to the edge of the tool in order to allow me to pick up the little pieces of gold directly onto the bottom of the tool. I worked my way along the signature pattern, applying little bits of gold as I went and cleaning up the lines with a soft cloth to remove the excess gold.
The two images below show the signature before and after the application of gold. I was very happy that it went well and I would be able to use this panel for the title on the box lid.


I then progressed on to the more challenging task of tooling the cursive siganture onto the spine of the book. Although the process of blind-tooling and then adding the gold in after was the same as the previous panel, this one was curved so a bit more tricky! The book was placed with the spine pointing upwards in a laying press in order for me to be able to work on it from above.


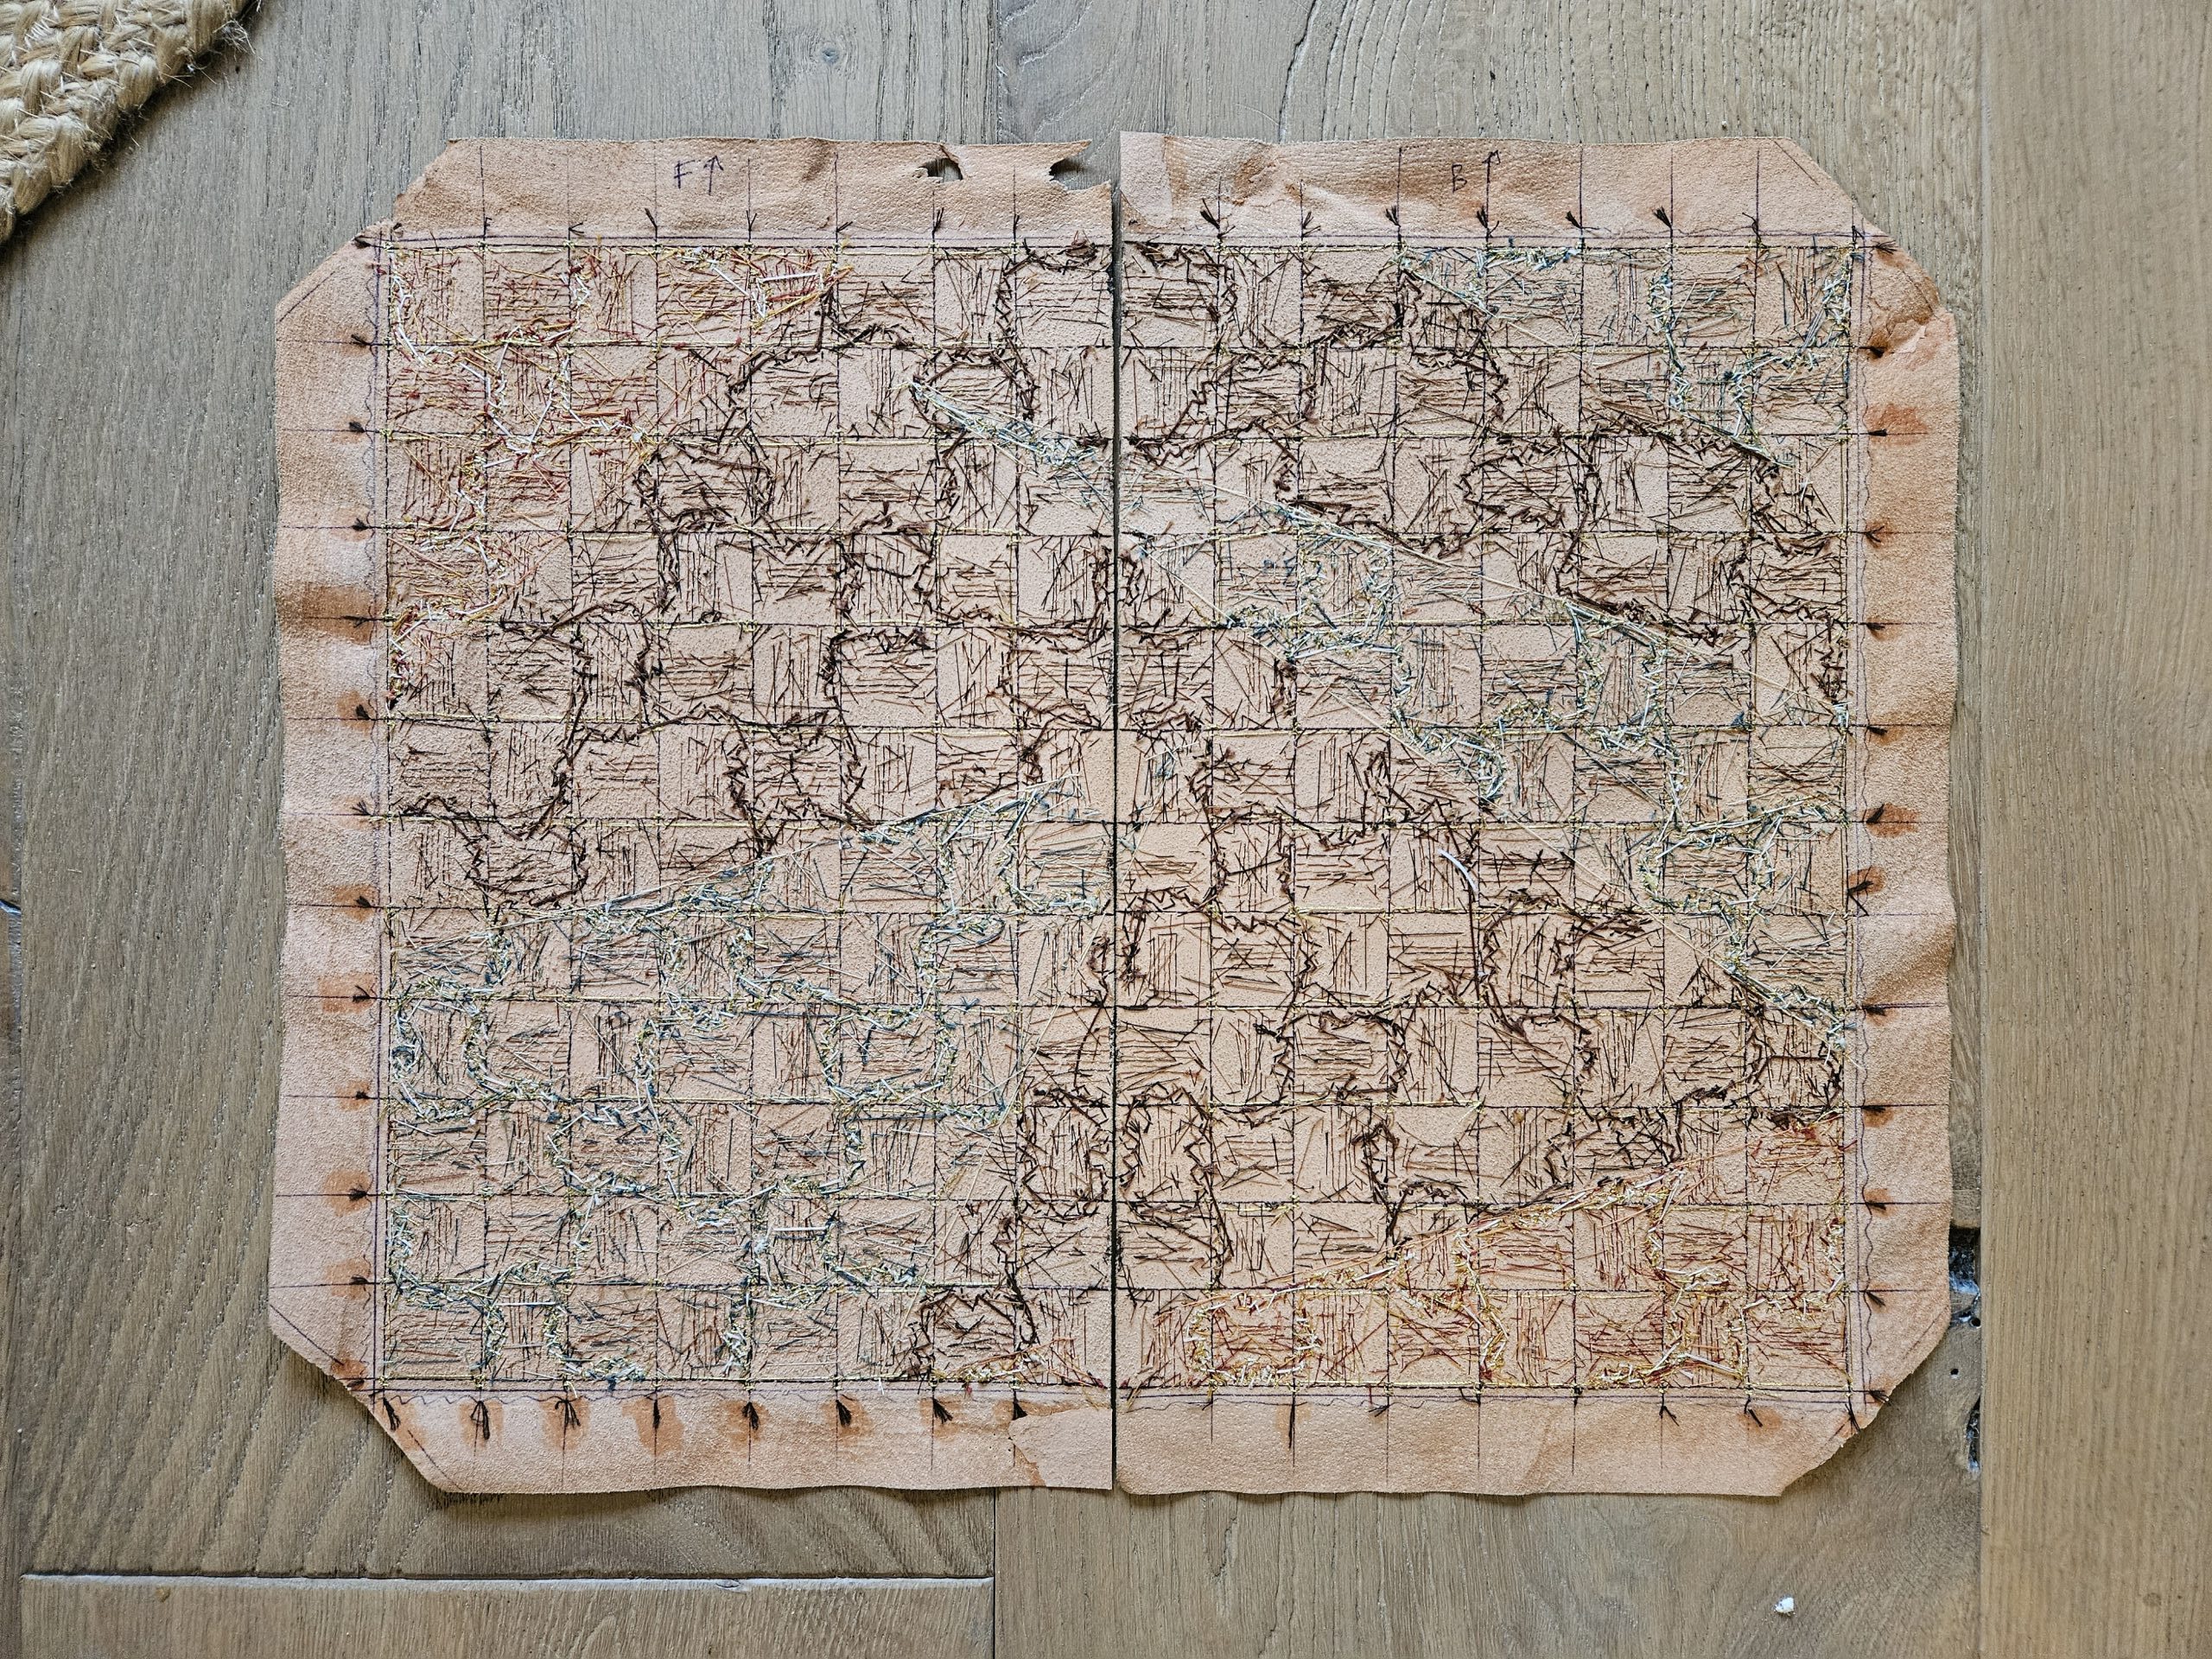
At this stage, I was then ready to cover the boards too. I always like to get a picture of the reverse of the covering leather before I stick it down to the covers as it will never be seen again. The reverse of the leather shows the rather chaotic paths of all the threads used to create the design on the cover.
The front of the leather shows a different story…
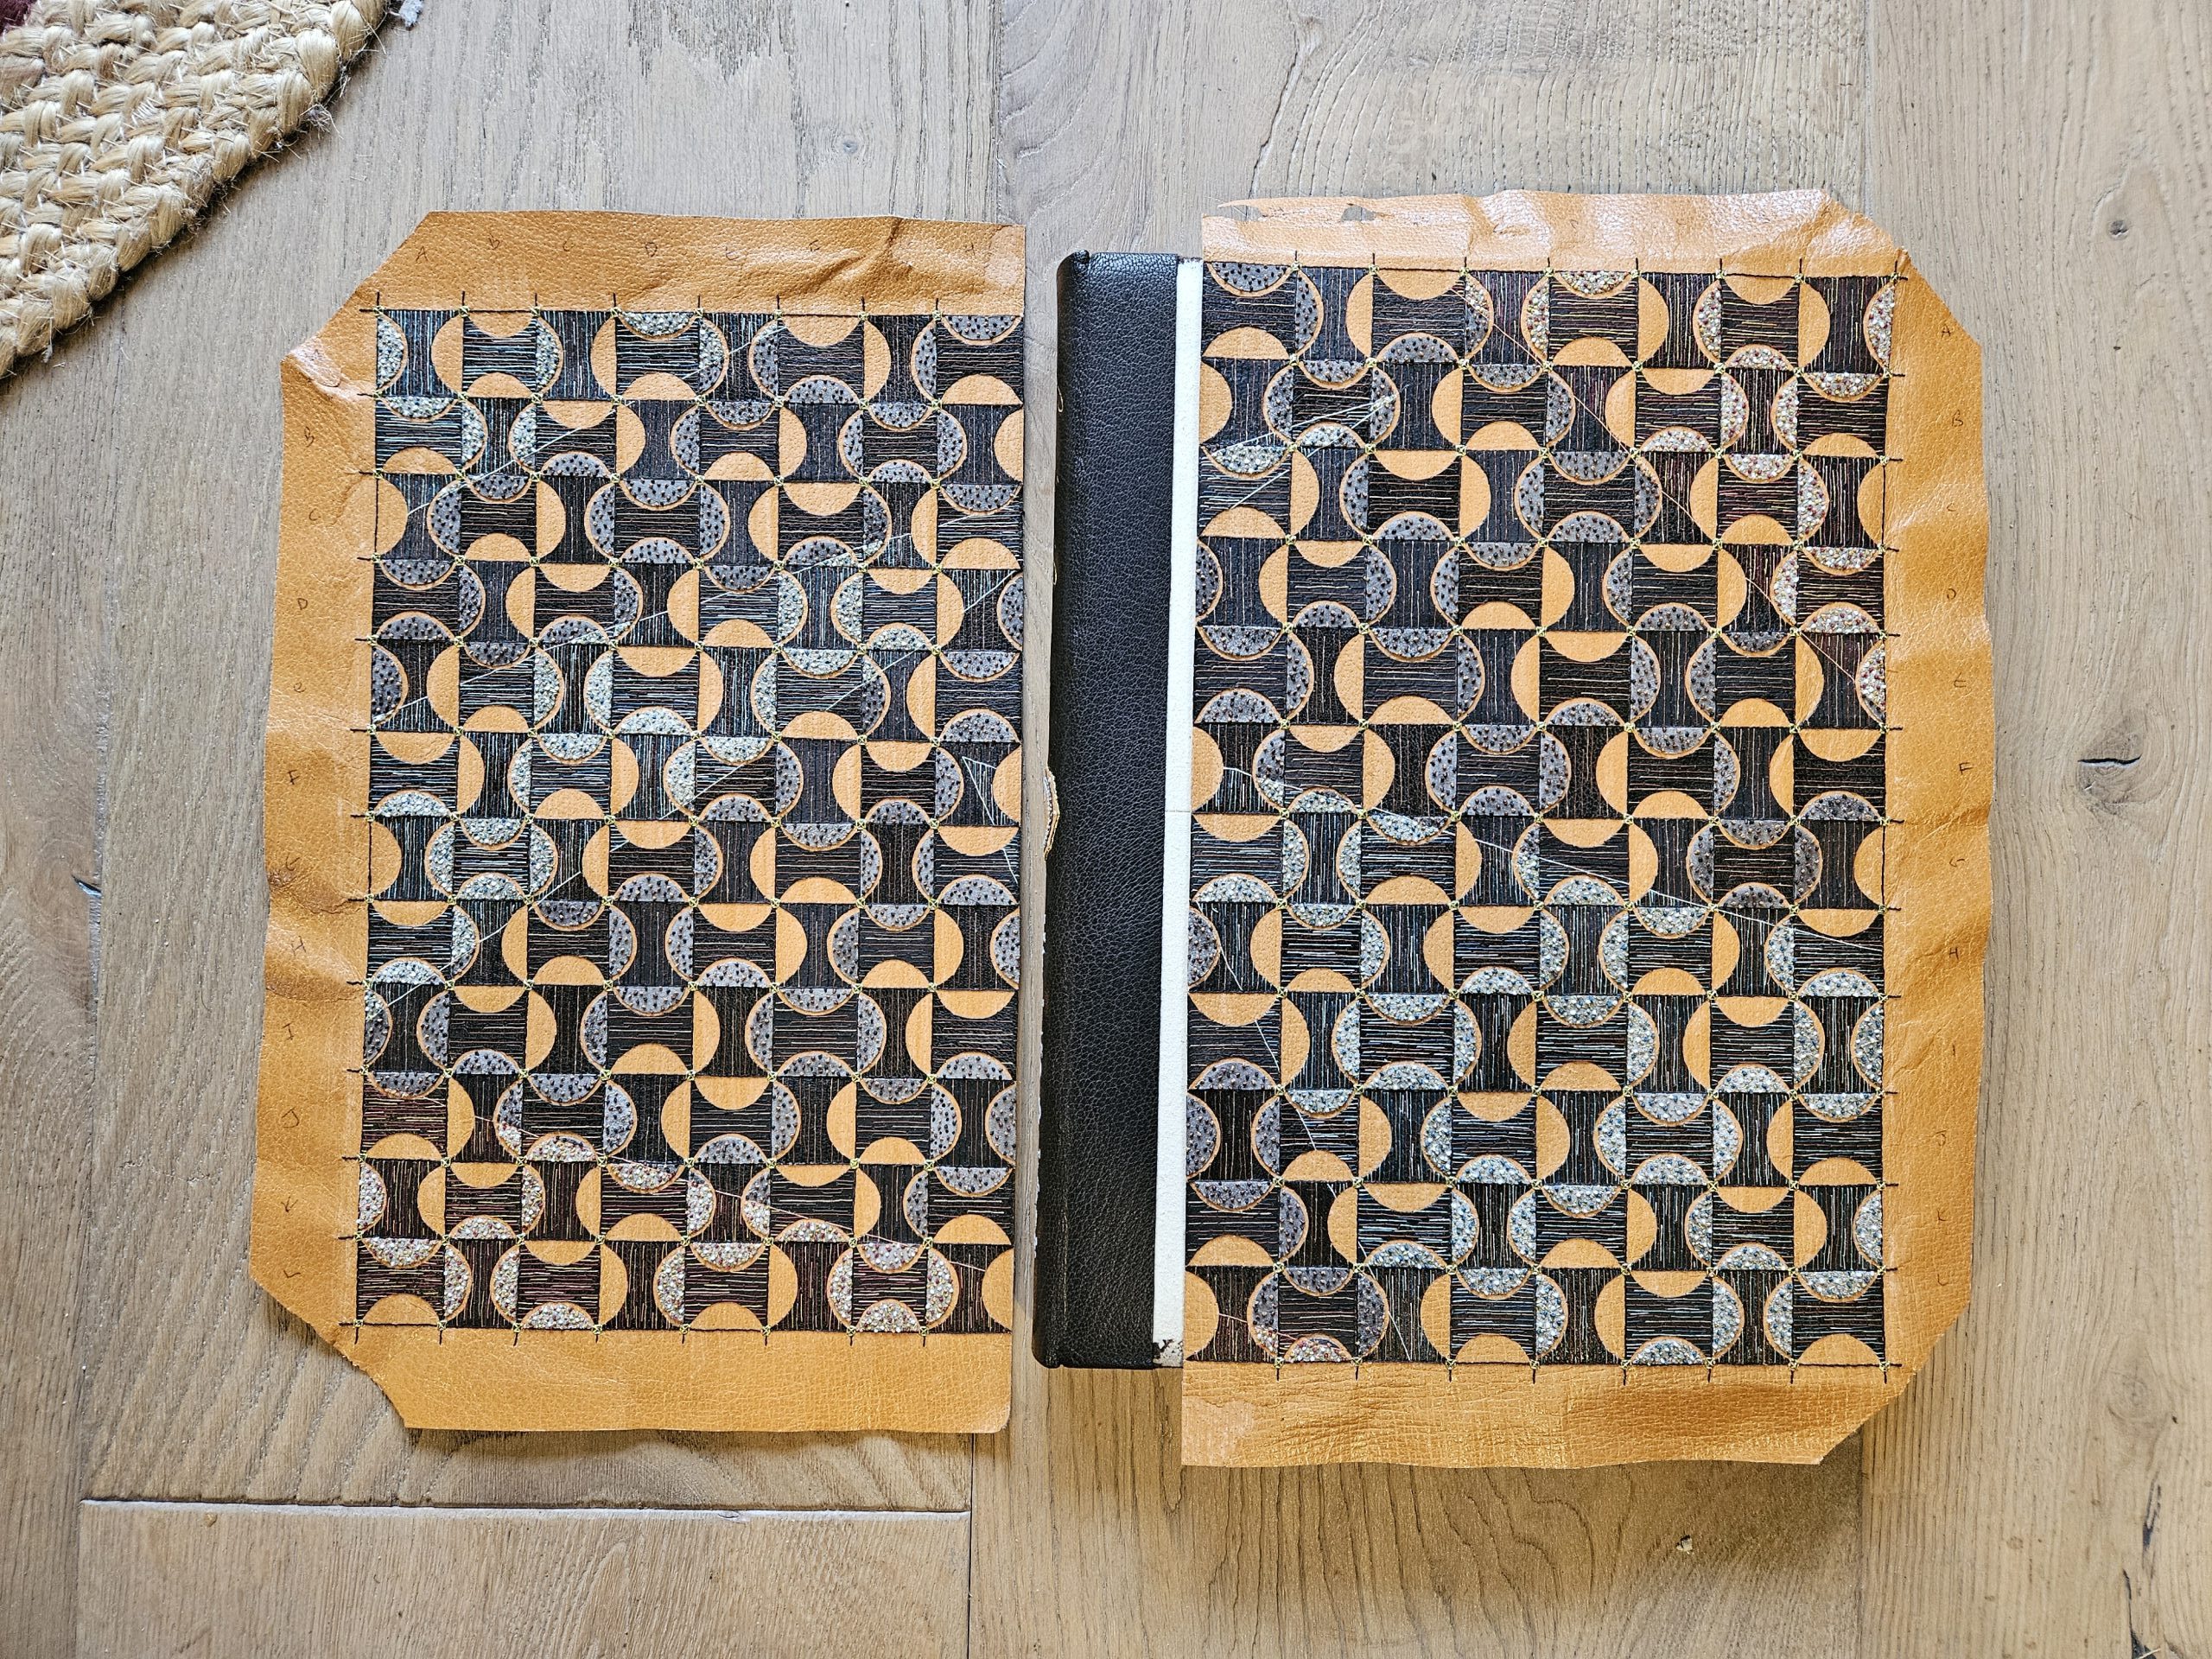


I applied paste to the reverse of the pigskin using a large brush and let it penetrate in before adding two more layers. When sticking the leather down in place I made sure it was pushed up perfectly flush with the brown goatskin on the spine, for a seamless join in this area.


The binding was left to dry overnight between boards and I changed the blotting paper regularly to draw out the moisture.
The final post in this series covers more detail about the profiled endpapers, the edge-to-edge doublures and the box.